January 9, 2024

Lechon Belly Recipe


As we gear up for the much-anticipated Media Noche celebration in 2024, one menu items the "Putok Batok" Pork Lechon Belly.  This recipe uses two slabs of pork liempo, making it practical for any home kitchen.

Breaking away from the conventional charcoal method, we've opted for a modern approach using the Imarflex Turbo Airfyer Convection and Rotisserie. Don't worry if you don't have an oven; this recipe is adaptable to an Air Fryer as well.

This Pork Lechon Belly recipe offers a modern twist to a classic dish, ensuring a crispy and flavorful centerpiece for any celebration. With a few adjustments, you can recreate the magic of a whole lechon right in your own kitchen. For an added flavor, Maggi Magic Sarap is included in the list of major ingredients.


Before diving into the cooking process, a bit of preparation is necessary. Ensuring a clean and hair-free surface is crucial, so a quick flame treatment for the skin is recommended.

Pork Lechon Belly Recipe


Ingredients:

1 kilo pork belly or liempo, bones removed.
1 whole onion, finely chopped
1 tsp ground black pepper
1 tsp garlic powder
1 tbsp salt
2-3 pieces bay leaves or laurel leaves
1 tsp rosemary
1 small pack of Maggi Magic Sarap
Oil for brushing


Instructions:


1. Make a cut on the meat to allow the flavors to permeate.

2. Rub the inside of the meat with a blend of ground black pepper, garlic powder, salt, bay leaves, rosemary, and Maggi Magic Sarap.

3. Sprinkle the finely chopped onions and, for an extra layer of flavor, include a lemongrass stalk if desired. Roll the belly tightly.

4. To keep the roll intact, tie it tightly. This step might require an extra pair of hands.

5. Place the rolled pork on the rotisserie rod and insert it into the preheated oven at 175ºC. Cook for 60 minutes.

6. Brush the skin with oil, increase the temperature to 190ºC, and continue cooking for another 45-60 minutes or until the skin turns brown and crispy.

7. Serve paired with lechon sauce or a toyo-mansi dipping sauce for an extra kick.

Read More »

December 10, 2023

Pork Salpicao with Mushroom Recipe

 
Pork Salpicao with Mushroom Recipe

Pork Salpicao is a delicious and flavorful Filipino dish renowned for its tender chunks of pork marinated and sautéed in a delectable blend of garlic, soy sauce, Worcestershire sauce, and sometimes chili peppers.

It's a dish that beautifully balances savory and garlicky flavors, often served with steamed rice, making it a satisfying and comforting meal. The aromatic essence of garlic combined with the succulent pork creates a delightful culinary experience that's both easy to prepare and incredibly enjoyable to savor.


You can also add mushrooms to your salpicao to introduce some texture, in addition to pork. For this recipe, I'll be using this Jolly Mushrooms (sliced) in a 100-gram tetra pack.


Here is a simple and easy-to-follow recipe of Pork Salpicao with Mushroom.

Pork Salpicao with Mushroom Recipe


Ingredients:

500 grams Pork Tenderloin, cubed
2 tbsp Oyster sauce
6 tbsp Worcestershire sauce
3 tbsp Soy sauce
1/2 tsp Sugar
1/4 tsp Red chili pepper flakes
1 head Garlic, minced
1/2 tsp Freshly ground black pepper
1/4 tsp Salt
1 100-gram pack of mushroom (sliced or whole)
Cooking oil


Instructions:


1. Prepare all the ingredients. In a large bowl, mix salt, black pepper, half of the minced garlic, 3 tablespoons of Worcestershire sauce, and 1 tablespoon of Oyster sauce. Stir well and add the pork cubes. Marinate for 20 to 30 minutes.


2. In a separate small bowl, combine the remaining ingredients: brown sugar, Worcestershire sauce, soy sauce, and red chili pepper flakes. Whisk the mixture until the sugar dissolves completely. Set it aside.


3. Take the marinated pork out and let it drain.


4. Heat a large frying pan or wok over medium heat. Add cooking oil. Fry the rest of the minced garlic until it browns, then remove it from the pan and set it aside.


5. Place the pork in the pan and fry it in batches. Cook until the outer parts turn brown, around 2 to 3 minutes per side.


6. Add the mixture of Oyster sauce, soy sauce, and Worcestershire sauce to the pan along with the fried garlic and muchroom. Stir regularly and continue cooking for 5 to 7 minutes.


Serve the dish hot with steamed rice and your preferred beverage.


Read More »

January 31, 2022

Chili Garlic Oil Recipe

easy recipe, chili garlic oil, chili garlic, chili garlic oil recipe,appetizer recipes,

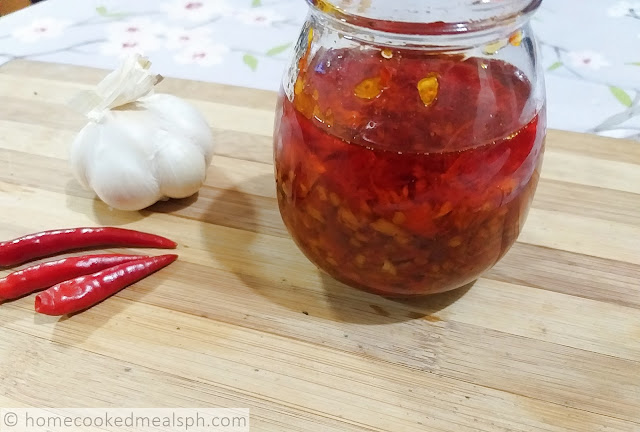
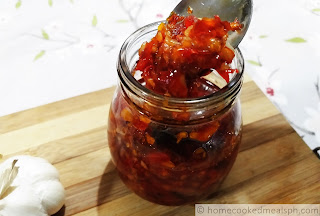
Chili garlic oil is one of the common condiments in Filipino dishes. It can be added to soy sauce and serves as dip for most fried dishes. 

Ground chili peppers and garlic is being infused in vegetable oil and seasoned with salt and pepper. Few amounts of vinegar is added as a preservative.


easy recipe, chili garlic oil, chili garlic, chili garlic oil recipe,appetizer recipes,


At home, we used to add chili garlic oil in mami. We also used it as dipping sauce for somai by mixing it with calamansi and soy sauce.


easy recipe, chili garlic oil, chili garlic, chili garlic oil recipe,appetizer recipes,

Here is a simple and easy-to-follow recipe of Chili Garlic Oil.

Chili Garlic Oil Recipe

easy recipe, chili garlic oil, chili garlic, chili garlic oil recipe,appetizer recipes,

Ingredients:
3 heads of garlic, peeled

¼ kilo chili pepper

3 cups vegetable oil

1 teaspoon of pepper

1 tablespoon of salt
2 tablespoons of sugar

2 tablespoons of vinegar
1 tablespoon of oyster sauce (optional)


Instructions:

1. Put the red chilies, garlic, and cooking oil into a blender. Blend until nearly smooth.

2. Pour the blended chili mix into a heated pan and cook on low heat for 15 to 20 minutes. Stir occasionally to prevent burning. Add salt, pepper, sugar, and oyster sauce. Mix well.

3. Afterward, add the vinegar. Let it sit unstirred for 3 minutes, then mix and continue cooking on low heat for another 15 to 20 minutes.

4. Turn off the heat and allow the mixture to cool before placing it into jars.

5. Use this delicious chili garlic oil as a dip or as a flavorful base for your savory dishes. Enjoy!


Read More »

January 13, 2022

Moist Banana Bread Recipe

recipe, Banana, banana bread, easy recipe, banana bread recipe, snack
We know that banana is abundant in our country. 

I saw a lot of bananas in the market sold cheaper because they are already overripe and have an unpleasing look. These bananas are good, but it needs to check if they are still suited for making banana bread.
 
Most banana bread uses the Lakatan and the Tampuhin (long, green) varieties. The Lakatan variety has consistent sweetness, while the Tampuhin has a strong banana aroma.
recipe, Banana, banana bread, easy recipe, banana bread recipe, snack
Banana bread's, also referred to as banana cake, main ingredients are flour, sugar, eggs, butter (margarine or oil), salt, baking soda, and mashed banana. 
 
Some recipes incorporate nuts like walnuts, macadamias, or chocolate chips in the mixture for a more enjoyable flavor. It can be cooked by baking or steaming.
 
Sliced banana and nuts are used as a garnish on top of the cake before baking, while others serve it with cream cheese or whipped cream.
recipe, Banana, banana bread, easy recipe, banana bread recipe, snack
One of the secrets to enhancing the appearance and flavor of the banana bread is by wrapping it in a cling-wrap and refrigerating overnight before serving.
 
I tried several recipes for banana bread. Here is a simple yet flavorful one.

Moist Banana Bread Recipe
recipe, Banana, banana bread, easy recipe, banana bread recipe, snack
Wet ingredients:
1/2 cup salted butter, browned
4 large eggs
2 ½ cups banana, mashed or puréed
1 cup sour cream (1 cup all purpose cream + 1 tbsp Apple Cider Vinegar or white vinegar)
1 tsp vanilla extract


Dry ingredients:

2 ½ cups all purpose flour

2 cups brown sugar

1 tbsp baking powder

1 tbsp baking soda

1 tsp salt

1 tbsp cinnamon


Instructions:

1. Brown butter in low to medium heat for 15-20 minutes with occasional stirring to avoid burning. Cool and set aside.
2. Pre-heat oven to 180°C.
3. Grease loaf pan or bread pan with melted butter.
4. Mix dry ingredients in a bowl using a whisk and sift at least three times.
5. In a separate bowl, whisk eggs, then add browned butter, mashed banana, and vanilla extract.
6. Fold 1/3 of the dry ingredients, followed by half of the sour cream. Do this until all of the dry ingredients have been added.
7. Add raisins and chocolate chips. Continue folding in a figure “8” until no more lumps. Do not overmix.
8. Fill the baking pan with batter to about ¾ full. Run a spatula to smoothen the top.
9. Place thinly sliced bananas on top (and nuts if preferred) and bake in the oven for 30-45 minutes or when a toothpick inserted in the center of the pan comes out clean.
Read More »

January 12, 2022

Easy Pandesal

pandesal, easy pandesal recipe, pandesal recipe, recipe, bread

Pandesal or in Spanish "pan de sal" meaning “salt bread” made from flour, yeast, sugar, oil, and salt.


Several variations of this famous morning bread emerges in the country. Ube pandesal and cheese pandesal are just few of the best-seller variety of pandesal.


The dough raised then shaped into a long log, portioned into about 1-2-inch balls followed by dipping in breadcrumbs. It is rested for at least 30 minutes before baking in the oven.

pandesal, easy pandesal recipe, pandesal recipe, recipe, bread

Some prefer it soft while others choose a bit toasted.


It is a common bread roll in the Philippines serve for breakfast with hot chocolate or coffee.


Pandesal is best served with spread like butter, dulce de leche or jam and a cup of hot coffee or chocolate.


Easy Pandesal Recipe
pandesal, easy pandesal recipe, pandesal recipe, recipe, bread
Ingredients

4 ¼ cups all purpose flour

6 tbsp white sugar

½ cup water

½ cup fresh milk

2 large egg

6 tbsp butter or margarine

1 tbsp instant dry yeast

1 tsp salt


Cooking Instruction
1. In a mixing bowl, combine all ingredients and mixed until dough forms.
2. Knead the dough in a for at least 15 minutes or until dough becomes elastic and forms a smooth ball.
3. Place in a slightly oiled bowl then cover with a plastic or cheesecloth.
4. Let it rest for 30 minutes to 1 hour or until the dough double its size.
5. Punch the dough and divide into a 50-gram portions.
6. Roll each portion into a ball portion and dip in bread crumbs.
7. Place in a baking pan with at least 2inches gap to each other.
8. Cover with plastic or cheesecloth and rest for about 15 minutes.
9. Bake in a 350F pre-heated pan for 15-20 minutes. You can add baking time if you prefer for a toasted pandesal.

10. Serve while hot.


Read More »

October 29, 2021

Crispy Sardines Burger Recipe

When we speak of sardines dishes, we commonly refer to canned sardines. In reality, sardines are small fish related to herrings. It was called "sardines" during the 15th century because this type of fish is once rich in the island of Sardinia.

There are many ways of canning sardines. The most common is in tomato sauce but the simplest of all canned is in brine solution. The other way is the Spanish style where the fish are packed with oil (corn oil or olive oil) and spices.
sardines, sardinas, crispy sardines burger, easy recipe, recipe

When we mention sardines, the typical way to serve is ginisang sardinas or can be eaten directly from the can. Just like last night, we had ginisang sardinas with upo for our dinner.

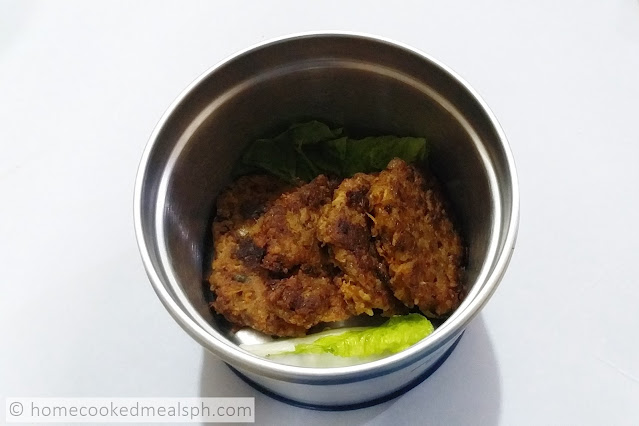
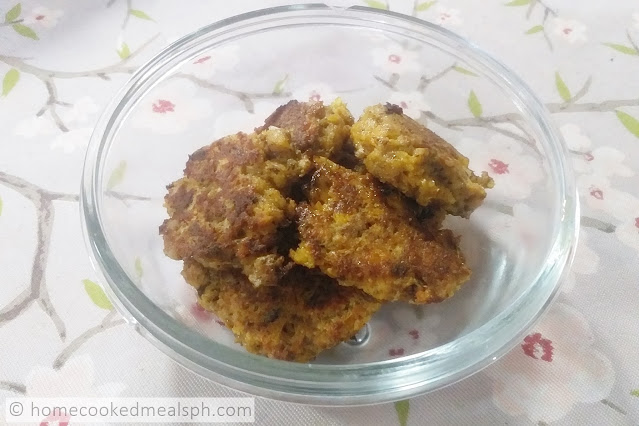
There are other ways to cook canned sardines. For example, I used to turn this into kikiam paired with spiced vinegar or fish ball sauce. But have you heard turning canned sardines into crispy burger patties?

Afraid of making the patties stick to the pan? You can use Tefal Frying Pan to finish a crispy sardines burger without a hassle.
Crispy Sardines Burger Recipe

This can be serve as an appetizer, main dish, or as sandwich.
sardines, sardinas, crispy sardines burger, easy recipe, recipe
Here is the effortless recipe of Crispy Sardines Burger. To make the burger patties healthier, you can add chopped malunggay leaves.

Crispy Sardines Burger Recipe
sardines, sardinas, crispy sardines burger, easy recipe, recipe
Ingredients
1 Canned Sardines in tomato sauce, drained and mashed
1 whole egg
1/4 cup all purpose flour
salt and pepper to taste
bread crumbs for coating

Cooking Instruction
1. Mix all ingredients , except for the bread crumbs.
2. Form patties of about 2-3 inches in diameter.
3. Coat with bread crumbs before frying.
4. Fry until golden brown or crispy.
5. Serve and enjoy.
Read More »

October 26, 2021

Misua Soup Recipe

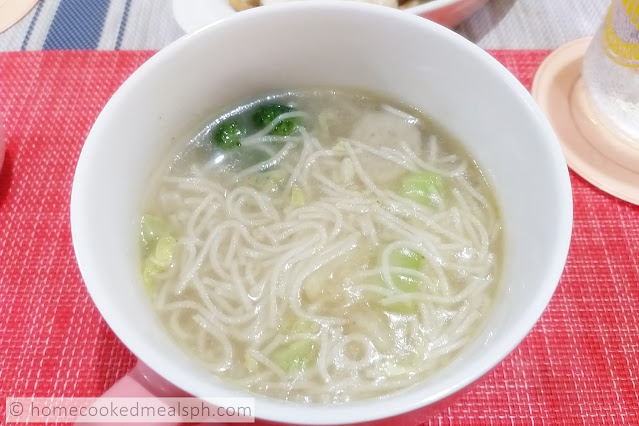
Here is another soupy meal that is perfect for the cold weather. Misua Soup.

Misua Soup Recipe


Misua noodle is a very thin salted noodles similar to vermicelli. It uses wheat flour rather than mung bean or rice flour. Because of its size, cooking the noodles in boiling water takes only two minutes or less.


Misua soup is similar to the usual misua patola recipe but it uses squid balls, kikiam and vegetables.


Toasted pork back fat or pork skin is added to enrich the flavor.


Here is an easy recipe of Misua Soup:


Misua Soup Recipe
Misua Soup Recipe

Ingredients:

¼ kilo pork back fat

1 cup squid balls, cut into 8

1 cup kikiam, sliced thinly

1 pack (100 grams), misua noodles

1 cup cabbage, shredded

¼ cup celery stalk, chopped

1 medium-size onion, chopped

4 cloves garlic, minced

Patis (fish sauce) and pepper to taste


Cooking instruction:

1. Render pork back fat until toasted or brownish.

2. Add onion and garlic and sauté until onions become translucent.

3. Add squid balls, kikiam, fish sauce, and 4 cups of water. Bring to boil.

4. Once started to boil, add cabbage and celery. Bring heat to low or medium level and continue simmer until vegetables are half-cooked.

5. Drop misua noodles and continuous stirring to avoid lumping of noodles.

6. Continue simmer until the noodles are cooked.

7. Serve while hot.

Read More »

October 20, 2021

Ginisang Mais Recipe

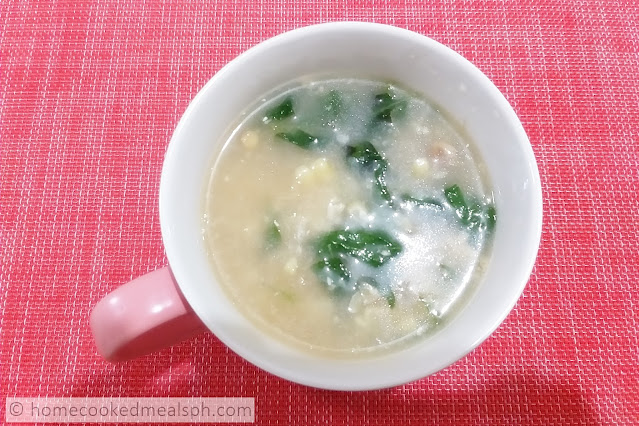
Ginisang Mais Recipe
The rain started to pour again and it makes the weather cold. Having hot dish or soupy meal is all you need to balance the ambient's temperature.

Here is a simple and easy to cook recipe that you can prepare in today's dinner. Ginisang Mais.

This creamy and steamy dish is similar to Suam Na Mais. The only difference is that the later commonly uses shrimp to make the dish falvorful.
Ginisang Mais Recipe

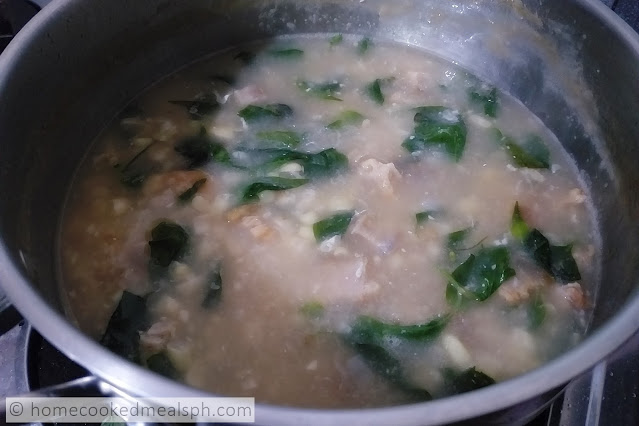
In this recipe I used rendered pork skin until a bit toasted to enhance the the taste.

Adding green, leafy vegetables contrast the color of the soup. Malunggay, spinach, or ampalaya leaves to name a few. It will also make ginisang mais more nutritious.
Ginisang Mais Recipe

Here is the simple recipe of Ginisang Mais:

Ginisang Mais Recipe

Ingredients:
1 kilo white corn, kernel shredded
1/4 kilo pork skin, rendered or toasted
1 onion, minced
4 cloves garlic, minced
1 cup ampalaya leaves, or any green leafy vegetables
Patis or fish sauce to taste

Cooking Instructions:
1. In the same pan where pork skin is rendered, saute onion and garlic.
2. Add corn, 2 cups of water, and patis. Bring to boil.
3. Over low to medium heat, simmer until thickens. Stir occaisionally to prevent the kernel sticking at the bottom of the pan.
4. Add ampalaya leaves and continue simmer until amplaya leaves are cooked.
5. Serve as is or with steamed rice.
Read More »

August 5, 2021

Pancit Malabon Recipe V2


Way back in our hometown, Muñoz, Nueva Ecijathere is a known panciteria named Thelma's Pancit Malabon. From the name itself, their specialty is Pancit Malabon. It is always thought that your visit to Munoz is not complete if you haven't dine in it.

recipe,easy recipe,easy recipes,pancit,Pancit Malabon,pancit,Pancit Malabon recipe,

Pancit Malabon originated from Malabon. It resembles to pancit palabok but the noodles are thicker and less saucy.

The yellow-orange hue is because of the achuete (annatto) oil.
recipe,easy recipe,easy recipes,pancit,Pancit Malabon,pancit,Pancit Malabon recipe,

There are many variations in toppings of these dish like cooked shrimp, squid, tinapa (smoked fish), and ground pork chicharon. Garnishes like chopped spring onions and pechay Baguio is also an option.
recipe,easy recipe,easy recipes,pancit,Pancit Malabon,pancit,Pancit Malabon recipe,
It is then served with a slice of calamansi to balance the salty flavor.

Here is a very simple Pancit Malabon Recipe:
Pancit Malabon Recipe
recipe,easy recipe,easy recipes,pancit,Pancit Malabon,pancit,Pancit Malabon recipe,

Ingredients:
1/2 kilo pancit malabon noodles, cooked according to packaging direction
1/4 kilo ground pork
1 cup all purpose flour
2 cups shrimp broth or 2pcs shrimp cubes dissolved in 2 cups water
2 large eggs, slightly beaten
1 onion, minced
4 cloves garlic, minced
achuete oil (heat 1/4 cup cooking oil then soak achuete seeds)
1 1/2 cup ground chicharon
Patis or fish sauce to taste

Cooking Instructions:
1. Saute onion and garlic in achuete oil.
2. Add ground pork and continue cooking until no more trace of blood.
3. Add all-purpose flour and mix until a paste-like consistency if obtained.
4. Pour the shrimp broth and bring to boil then reduce the heat to low level and simmer for bout 3-5 minutes.
5. Add slightly beaten eggs, ground chicharon, and patis. Mix well.
6. Continue simmering until thickened about to curdle.
7. Toss in cooked pancit malabon noodles.
8. Top with ground chicharon and serve with calamansi.
Read More »

September 21, 2020

Mashed Potato Recipe

Mashed Potato Recipe

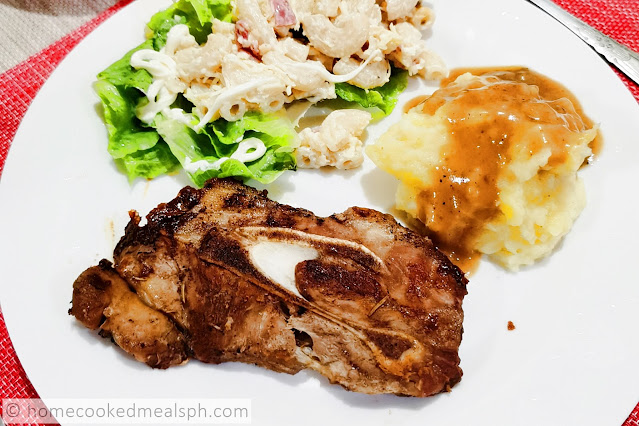
One of the best way to pair a slab of meat or steak is Mashed Potato.

Mashed potato is one of Matthew's favorites every time we dine. Unfortunately, due to community quarantine imposed because of the pandemic, having meals outside is not yet feasible.

Why not make mashed potato at home? Madali lang naman gawin.

In making mashed potatoes, the Russet potatoes are the good variety to be used.

Russet potato is large, dark brown skin with minimal eyes. The flesh is white, dry and mealy making it best for baking, mashing, and fries. It is also starchy and easily fall apart upon cooking making it easy to mash.

To cook it faster, peel the potatoes and cut into 4 and boil in cold water


Once cooked, let them sit about 5 minutes or so to completely drain or even drain well.


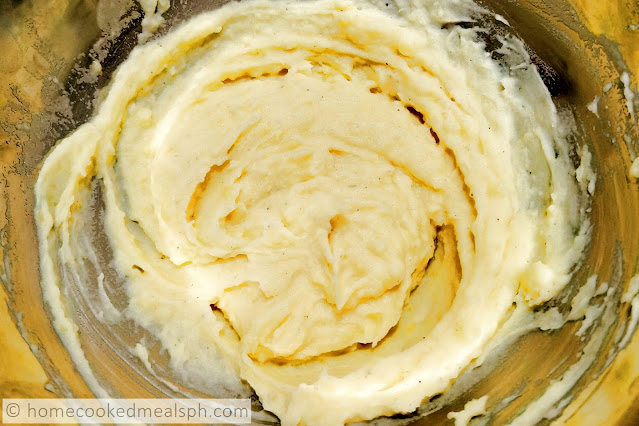
Mashed by hand. You can use a hand masher or a potato ricer. This is because using a hand mixer, stand mixer or food processor can break down the starches in the potatoes and cause a very gluey or gummy texture.


Use may use salted or unsalted butter. Adding butter helps mashed potatoes get a creamy and buttery texture.

Heat your milk/cream before adding to  keep the potatoes hot and absorbs better.  Then add cream/milk a little a time to get the right consistency. Season with salt and pepper.

Mashed Potato Recipe

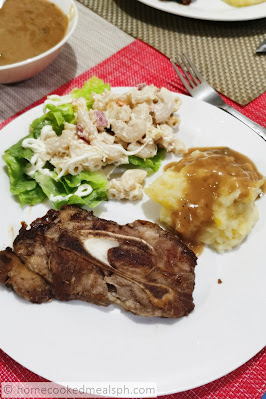
This is best paired with steak or fried chicken.

Mashed Potato Recipe

Mashed Potato Recipe

Ingredients:

1/2 kilo potatoes, peeled and cubed
1/3 cup salted butter
1/2 cup milk (you can add more)
salt and pepper to taste

Cooking Instructions:

1. Place the peeled and cubed potatoes in cold salted water. (For even cooking)
2. Bring to a boil and cook uncovered 15 minutes or until fork tender. Drain well.
3. Heat milk on the stove top (or in the microwave) until warm.
4. Add butter to the potatoes and begin mashing. 
5. Pour in milk a little at a time to reach desired consistency.
6. Season with salt and pepper. 
Serve hot topped with gravy sauce and paired with steak, fried or grilled chicken.

Serving size: 2-3

Read More »

September 9, 2020

Banana Bread Cinnamon Rolls Recipe

Here is another easy-to-do snack recipe. The Banana Bread Cinnamon Rolls.

Banana Bread Cinnamon Rolls Recipe

This snack uses loaf bread, white or wheat bread will do, and banana as two of the main ingredients.

The Banana Bread Cinnamon Rolls  is a great for your kids nowadays that most of them are attending online school because of the pandemic.

Actually, you can also encourage them to help you prepare and cook in the kitchen.


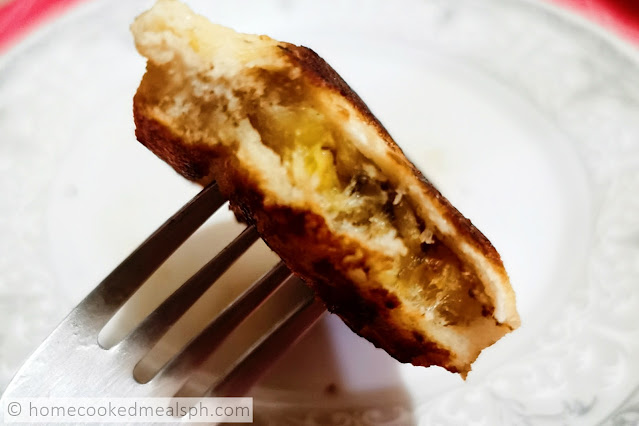
Slices of banana is first cooked in little amount of butter and sugar.


It is then wrapped in a flattened loaf.


Dipped in a cinnamon-milk-egg mixture.

Then fried until golden brown.


This is not only good as merienda but can also served as breakfast paired with a cup of coffee or chocolate.

You can prepare the wrapped banana, stored in the fridge then fried in the morning.

Banana Bread Cinnamon Rolls Recipe

Banana Bread Cinnamon Rolls Recipe

Banana Bread Cinnamon Rolls Recipe

Ingredients:

3 medium banana (Saba)
6 Bread slices
2-3 tablespoons Butter
1 tablespoon Sugar (brown/white)
1 egg
1/2 cup milk
1/4 teaspoon Cinnamon powder

Cooking Instruction:

1. Trim the edges of slices bread, then flatten each bread with a rolling pin. Set aside.
2. Cut the bananas into half, melt one tablespoon of butter in the pan. Add sliced bananas, 1 tablespoon of sugar and cook both side of the banana.
3. In a bowl, beat eggs, milk and cinnamon.
4. Wrap the fried banana with the flatten bread.
5. Dip each roll in egg mixture.
6. In a pan over medium heat, melt 1-2 tablespoons of butter. Fry each roll until sides are golden.
7. Drain on a paper towel. Dust with powdered sugar and serve warm.

Serving size: 2

Read More »

August 10, 2020

Dulce De Leche Recipe

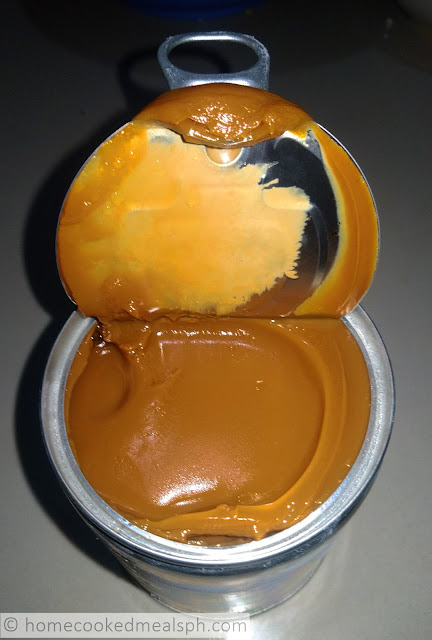
Over the weekends, I made Dulce De Leche as requested by Mommy.


Making this one will test your patience because you need to cook condensed milk for 3 to 4 hours.

easy recipe, recipe, easy recipes, dulce de leche, dulce de leche recipe, dessert recipes, dessert, sweets, condensed milk, condensada, kitchen tips, difference between condensed milk and condensada

Doing this recipe needs you to check first what you are going to use. Condensed Milk is often replaced with "Condesada" since it is cheaper but ending to a liquid rather than a thickened milk.

Why replacing Condensed Milk with Condesada is not recommended in making Dulce De Leche? 

Here are some notes.

easy recipe, recipe, easy recipes, dulce de leche, dulce de leche recipe, dessert recipes, dessert, sweets, condensed milk, condensada, kitchen tips, difference between condensed milk and condensada

Condensed Milk is different from Condensada
Although condensed milk and condesada look and taste the same when opened, their composition is entirely different. Condensed Milk is milk with sugar while Condensada is condensed creamer.

Like Condensed Milk, Condensada is also sweetened condensed milk but commonly mixed with vegetable oil, whey powder, skim milk, maltodextrin, carrageenan, salt, and lactose.

After cooking
Condensed milk and Condensada will both become dark brown when cooked. However, condensed milk will become thick while condensada remains liquid.

What to use? (Got from Chef Jackie Ang Po )
Condensed Milk is good for Dulce de leche, yema filling for brazo de mercedes, for baking, or anything that needs to be thickened.

easy recipe, recipe, easy recipes, dulce de leche, dulce de leche recipe, dessert recipes, dessert, sweets, condensed milk, condensada, kitchen tips, difference between condensed milk and condensada

For other recipes, you can use either condensed milk or condesada like Leche flan, halo-halo, fruit salad, sauces, and anything that does not need thickening like spreads and dips.

There are several ways of doing dulce de leche – the traditional way, opened can of condensed milk, unopened can of condensed milk.

Traditional Way
This method uses raw milk mixed with sugar, baking soda, and vanilla or other flavorings. It is cooked until thickened.

Opened can of condensed milk
The milk is either baked in an oven, cooked in a microwave oven, or cooked in a double boiler.

Unopened Can of Condensed milk

easy recipe, recipe, easy recipes, dulce de leche, dulce de leche recipe, dessert recipes, dessert, sweets, condensed milk, condensada, kitchen tips, difference between condensed milk and condensada

The entire unopened can of condensed milk is submerged in water and simmer 3-4 hours. A pressure cooker can be also used to reduce the cooking time from hours to 30-40 minutes.

Here what I did for the Dulce De Leche:

Dulce De Leche

easy recipe, recipe, easy recipes, dulce de leche, dulce de leche recipe, dessert recipes, dessert, sweets, condensed milk, condensada, kitchen tips, difference between condensed milk and condensada

Ingredients:

1 can Alaska Condensed Milk

Cooking Instruction:

1. In a sauce pan, submerge at least 3/4 of the can with water.
2. Bring to boil and simmer for 4 hours.
3. Remove the can from the water and cool at room temperature before opening.
4. Transfer in a glass container.

Serving size: 370 ml
Read More »